Difference between revisions of "5.3 Running the Model"
| Line 29: | Line 29: | ||
This will run all the procedures in sequence starting with PopulationSim and DaySim data tools. These tools need to be run only when running the scenario for the first time unless there is a change in the inputs. Running these again will not result in an error but is redundant and will increase the runtime significantly. For subsequent runs, load the ‘Model_only_no_tools.xml’ procedure parameter file which has the ‘Synthetic Population/DaySim Tools’ group deactivated. | This will run all the procedures in sequence starting with PopulationSim and DaySim data tools. These tools need to be run only when running the scenario for the first time unless there is a change in the inputs. Running these again will not result in an error but is redundant and will increase the runtime significantly. For subsequent runs, load the ‘Model_only_no_tools.xml’ procedure parameter file which has the ‘Synthetic Population/DaySim Tools’ group deactivated. | ||
| − | *Refer [[3.8 Configuration] | + | *Refer [[3.8 Configuration]] |
Revision as of 06:30, 13 March 2023
To get started with NERPM-AB v2.2, download the model package and unzip the contents into a directory with read/write access. Ensure that the directory has at least 28 GB of free disk space for a scenario run. If not already installed, install the latest version of the PTV Visum software (2023 [SP 1-3] or above). Now, follow these steps to start a base or future-year model run:
- Open the appropriate version file from the root directory by double-clicking the file. Open the NERPM_D2_2015_MAZ.ver file for the base year run and NERPM_D2_2045_MAZ.ver for the CF2045 run.
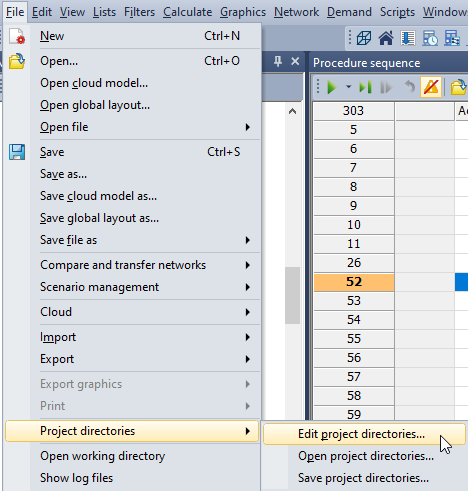
- Before starting a model run, the project directories must be set to the root directory of the model setup. This ensures that all relative paths in the model scripts are valid. Set the project directories by selecting the ‘Edit project directories’ option from the main menu bar:
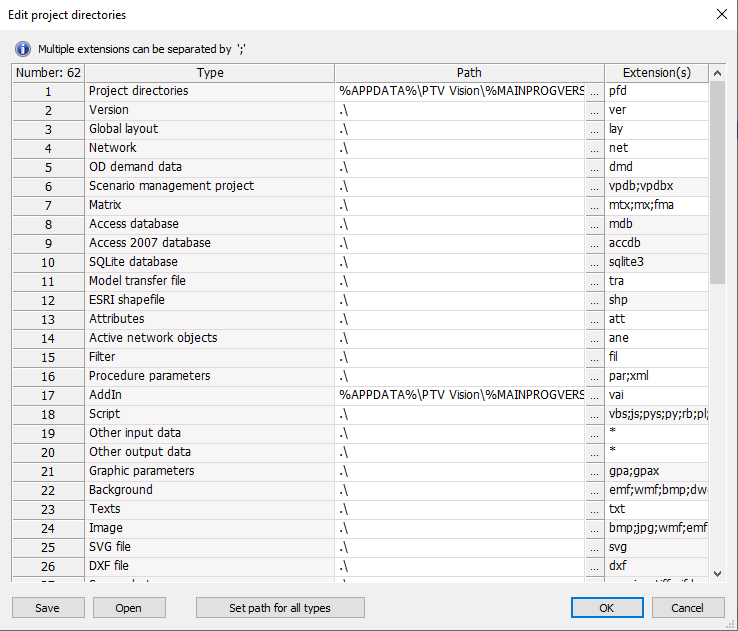
In the ‘Edit project directories’ window, left-click the ‘Set path for all types’ button at the bottom of the window:
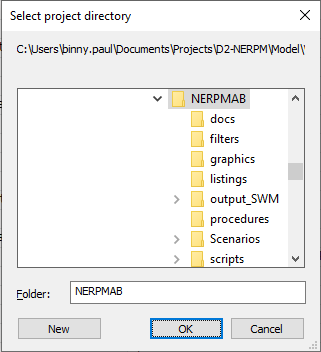
Choose the root directory of the model setup from the ‘select project directory’ dialog box and click OK to exit the dialog boxes:
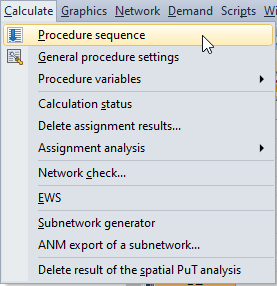
- Next, open the procedure sequence window by clicking the ‘procedure sequence’ icon on the windows toolbar as circled in red below:
The following window will open with a preloaded procedure sequence with all procedures activated:
- When running the model for the first time, simply start the model by left-clicking the ‘Start procedure sequence' button on the menu bar of the procedure sequence window:
This will run all the procedures in sequence starting with PopulationSim and DaySim data tools. These tools need to be run only when running the scenario for the first time unless there is a change in the inputs. Running these again will not result in an error but is redundant and will increase the runtime significantly. For subsequent runs, load the ‘Model_only_no_tools.xml’ procedure parameter file which has the ‘Synthetic Population/DaySim Tools’ group deactivated.
- Refer 3.8 Configuration


